
Build a blog using Github Pages and Jekyll
This blog introduces how to build own blog using Github Pages. With Jekyll I have easily built my own blog.
I registered a domain (cloudabc.eu) few weeks ago. Later I decided to build a blog. I did some research on some VPS or web hosting solutions of some cloud providers, all are not cheap. Fortunately I found an article which introduces how to build blog using Github Pages [1]. Following the instruction, I successfully built a blog using jekykll-now [2]. Later I moved to forever-jekyll [3] which provides more features.
This article uses forever-jekyll as examples. Assume the github account is <myaccount>.
Step 1: Create a repository for Github Pages
There are two options:
- Option 1: Fork the repository
forever-jekyll, and rename the new repository to<myaccount>.github.io; - Option 2: Create a repository
<myaccount>.github.ioand copy the files offorever-jekyllinto the repository.
Now the website is available: https://<myaccount>.github.io
Step 2: Add CNAME Record for the blog
Go to the name service provider and add a CNAME Record. Here is what I added

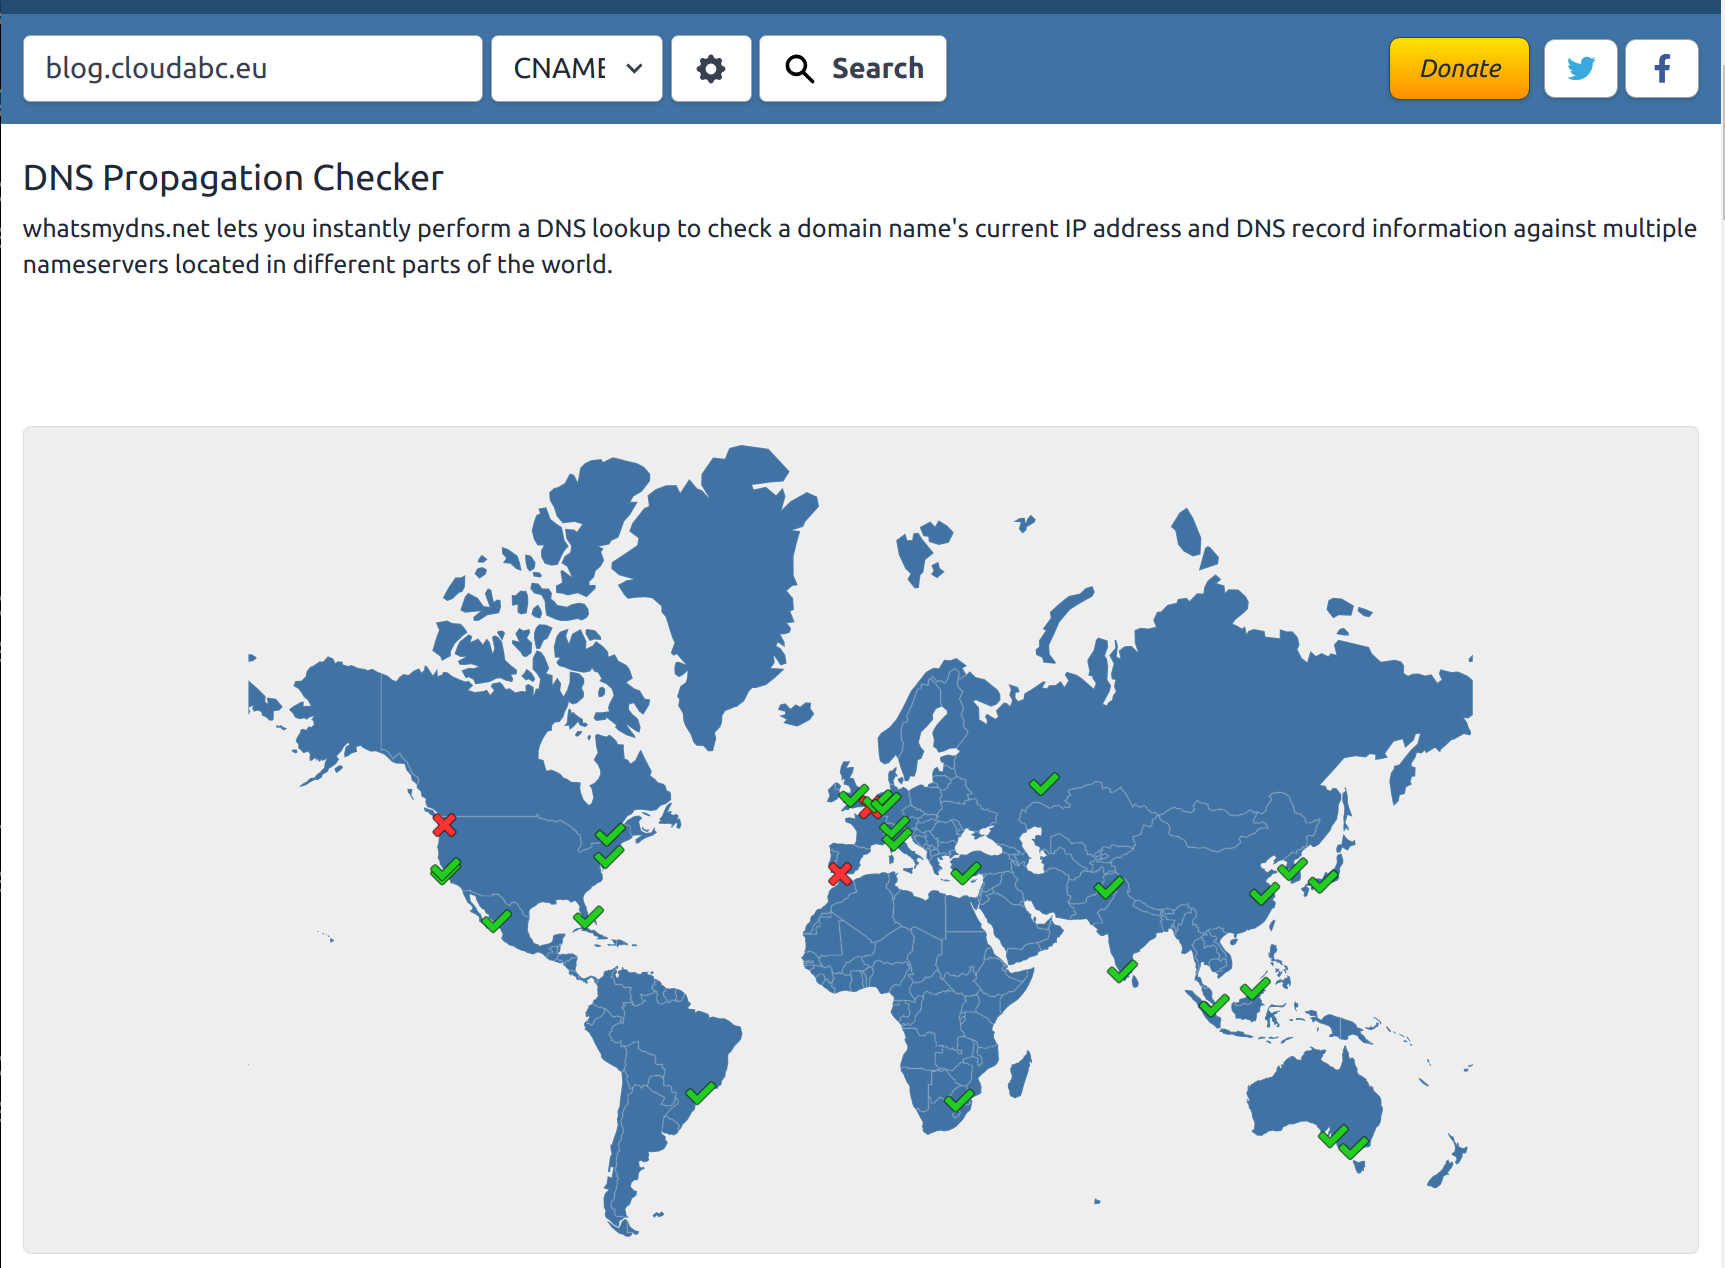
Check if the DNS is propogated on What’s My DNS
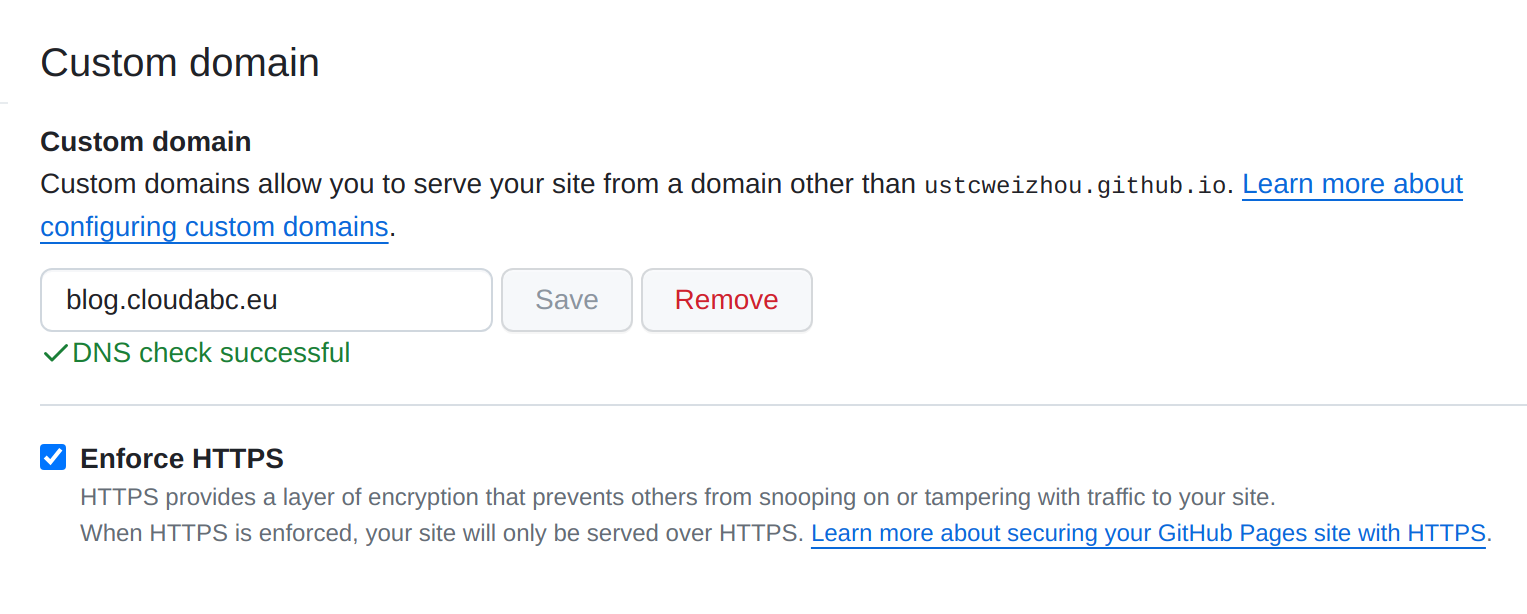
Step 3: Configure custom domain on Github repository
Go to Settings -> Pages, in the “Custom domain” section, type the domain name and click “Save”. It will be OK after a while.
When it is done, click “Enforce HTTPS”.
Please refer to step 1 to 4 on Configuring an apex domain.
Step 4: Update _config.yml
Update the configuration file _config.yml with new value of
- title (e.g.
Cloud ABC) - description (e.g.
Above and Beyond the Clouds) - url (e.g.
https://blog.cloudabc.eu)
Step 5: (optional) Support disqus blog comment
forever-jekyll supports Cactus Comments. However I like the disqus blog comment service more which is supported jekyll-now. Therefore I copied the file from jekyll-now.
- Add the following to file
_config.yaml# Enter your Disqus shortname (not your username) to enable commenting on posts # You can find your shortname on the Settings page of your Disqus account disqus: - Create new file
_includes/disqus.html
{% if site.disqus %}
<div class="comments">
	<div id="disqus_thread"></div>
	<script type="text/javascript">

	    var disqus_shortname = '{{ site.disqus }}';

	    (function() {
	        var dsq = document.createElement('script'); dsq.type = 'text/javascript'; dsq.async = true;
	        dsq.src = '//' + disqus_shortname + '.disqus.com/embed.js';
	        (document.getElementsByTagName('head')[0] || document.getElementsByTagName('body')[0]).appendChild(dsq);
	    })();

	</script>
	<noscript>Please enable JavaScript to view the <a href="http://disqus.com/?ref_noscript">comments powered by Disqus.</a></noscript>
</div>
{% endif %}
You can find it at disqus.html
- Add to file
_layouts/post.html
    {% include post-nav.html %}
  </div>
+
+ {% include disqus.html %}
</article>
Step 6: Create a POST
To create a POST, create a file in _posts folder with filename in format YEAR-MONTH-DAY-title.md
Here is an example (file: _posts/2024-02-10-Happy-Chinese-new-year.md)
---
layout: post
title: Happy Chinese New Year
categories: [personal]
---

the Year of Dragon !

<!--more-->

Next: 29 January 2025, the Year of the Snake.
You can find more instructions on forever-jekyll and forever-jekyll.github.io/tree/main/_posts
Step 7: (optional) Test posts locally
To test blog locally, install gem plug-ins. Here are the commands run on Ubuntu 22.04
sudo apt install ruby-rubygems ruby-dev
sudo gem install github-pages
# Do NOT forget: Add `gem "kramdown-parser-gfm"` to Gemfile
sudo jekyll serve
# If it does not work, run `sudo bundle update`
# Access http://localhost:4000/
References
- [1] https://www.smashingmagazine.com/2014/08/build-blog-jekyll-github-pages/
- [2] https://github.com/barryclark/jekyll-now
- [3] https://github.com/forever-jekyll/forever-jekyll